
blog
-
From where we left off last time, click the “Custom Domains” option.
Custom Domain - Fig.1 -
Click on “Set up a custom domain”
-
Type in your domain name
-
This section will now vary depending on how your domain is set up. You’ll want to follow Cloudflare’s instructions at this point.
-
Once finished, which CAN take up to 48 hours, will end with your new site being accessible at your own domain name!
-
Once you are signed into your new Dashboard, click “Pages” on the left and we’re going to “Create a project” and “Connect to Git”.
-
You’ll need to go through the process to connect Cloudflare to your GitHub account.
-
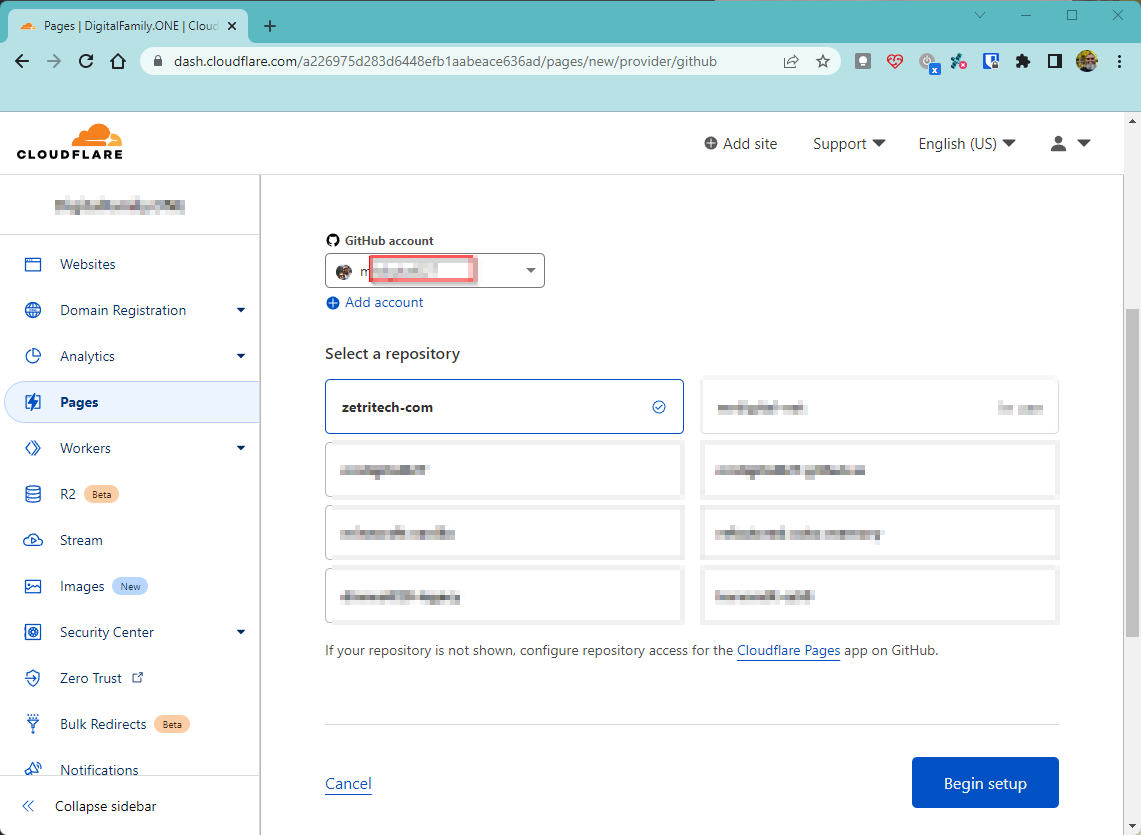
Select your repository, in my example it’s zetritech-com and then Begin Setup
Repo and Setup -
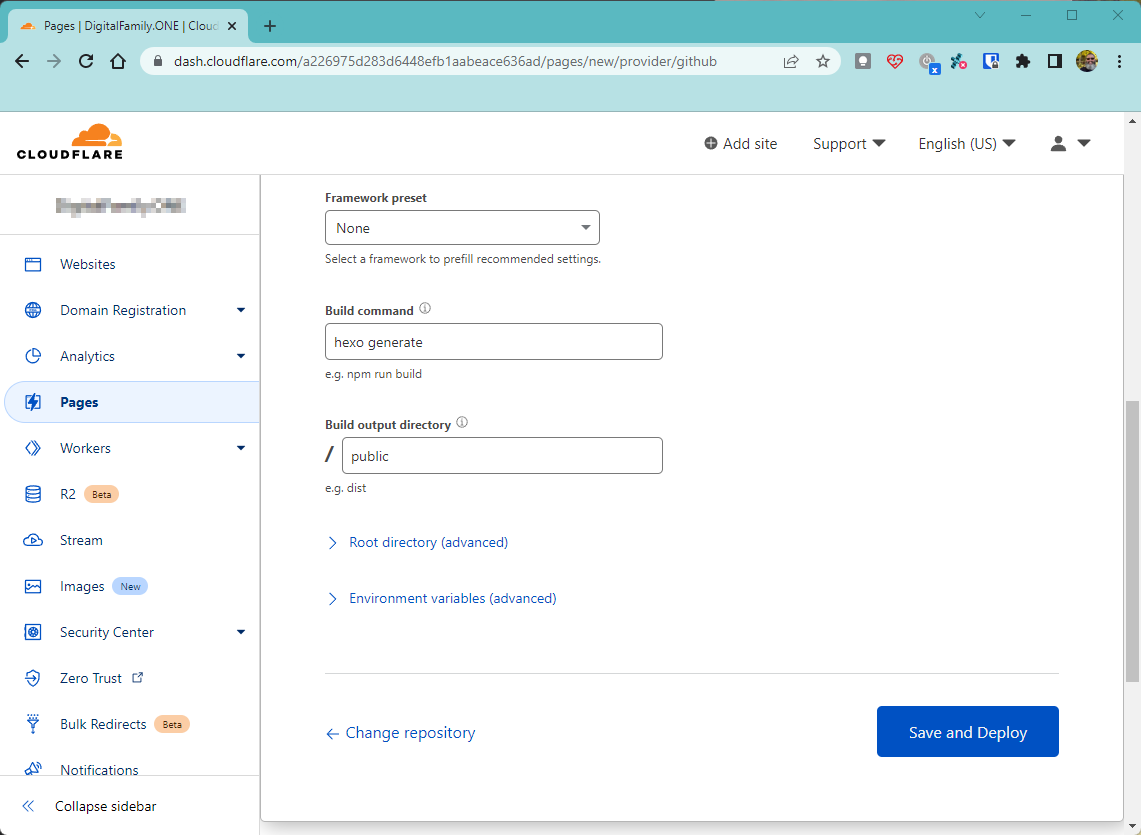
Give it a name, pick a branch (likely main) and then scroll down to Build settings:
Build settings -
For Hexo, you’ll want the Build Command to be
hexo generate -
Build output directory to be public
-
Click Save and Deploy
-
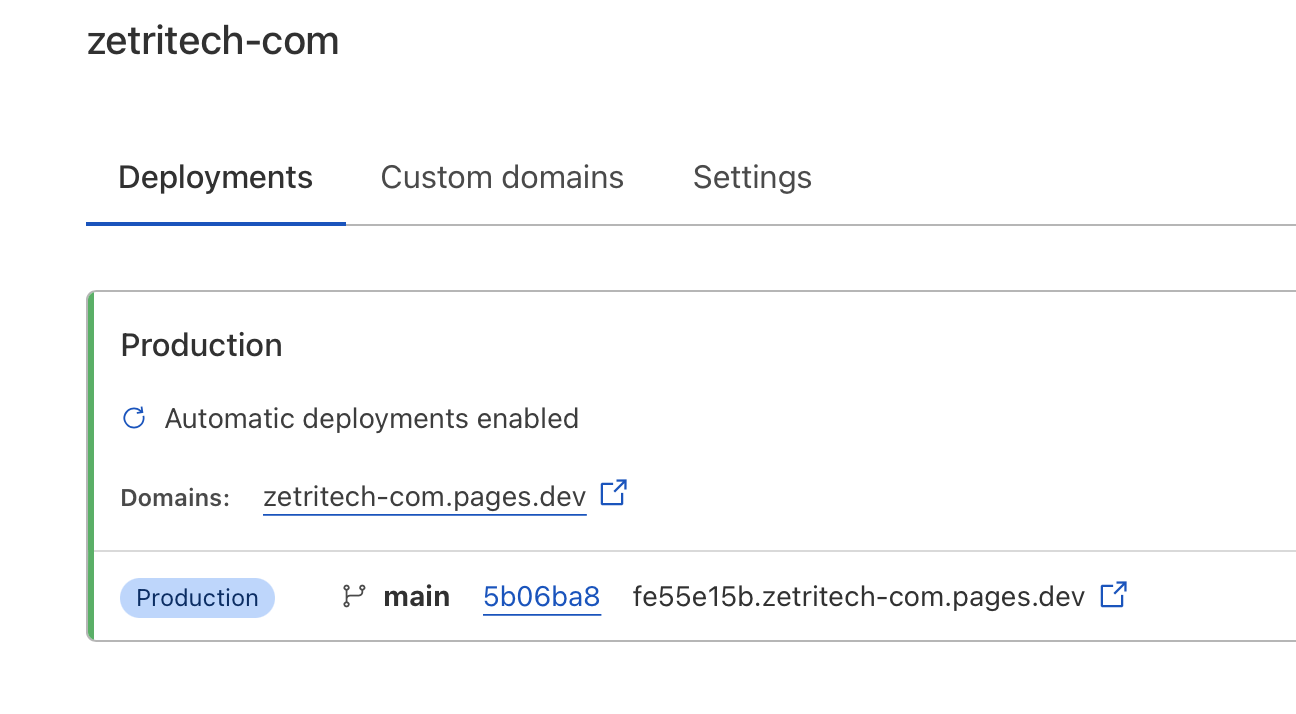
If everything went as it should you should have been given a link, which right now isn’t very user friendly but it should work!
Look, a site! - There is some software that I personally use and recommend, they are all free and well established. Things to manage your local GitHub repository and for editing files
- Go to GitHub and set up a new account if you don’t already have one. You’ll be wanting to create a new Repository or use one you’ve already made for this purpose.
-
You’ll have a drop down option under the green “Code” button to open with GitHub Desktop, this is the easiest way

Open with GitHub Desktop -
GitHub Desktop will ask you where you want to save the repo etc, just make sure you know where it is as we’ll be referring back to this later. I’ll be using “D:\Github\reponamehere” as an example
-
Now that we have your new empty website repository downloaded to your PC we need to actually get some software installed (yes, more) to get the website structure in place, remember we’ll be using Hexo for our demo.
-
So here is where things start to get a bit more technical and we’ll be referencing to the “terminal” and “command line” a bit.
-
We need an elevated powershell terminal to run the following command so you can usually just right click your Start menu and click PowerShell (Admin).
-
We’ll be installing Microsoft’s Windows Subsystem for Linux as I find it much easier to run all the commands and programs we’ll be using for the website environment. Full documentation can be found at the Windows Subsystem for Linux website. If the below commands fail, you’ll have to investigate this issue and resolve it.
NOTE if you are running Windows 11 you can skip to step 10 and install it directly via the Store.
wsl --install``
-
You should see several items download and install and finally it says the changes will take affect on next reboot. Reboot before we continue and get back into GitHub Desktop and Visual Studio Code
-
After reboot the system will have you finish the Linux install.
-
Open the Microsoft Store and search for Ubuntu, we actually need the 22.04 version (as of this writing, 07/23/2022).

Ubuntu 22.04 -
The easiest way moving forward is to just work inside the Visual Studio Code app so with your new repo open in GitHub Desktop you can just click the “Open in Visual Studio Code” and we’ll start there.

Open in Visual Studio Code -
With Visual Studio Code open this is the layout you’ll see on a fresh repo:

Fresh Repo -
We want to open a terminal so hit CTRL + ` or click the Terminal menu and click New Terminal
-
With the terminal open you’ll see a little + with down arrow, click this down arrow and select your new Ubuntu environment:

Ubuntu WSL -
In the new Ubuntu $ prompt you’ll have below we need to install a couple modules to power our new Hexo environment. Run each command in the terminal window. The commands explained:
- the first two commands, apt update and upgrades fetches the latest package directory from the internet and installs them.
- nodejs is the JavaScript runtime engine.
- npm is essentially the online repository of packges we can install.
- hexo-cli is the actual Hexo engine we need.
sudo apt update
sudo apt upgrade
sudo apt install nodejs
sudo apt install npm
sudo npm install hexo-cli -g
``
-
You can now verify you have hexo installed by using the following command
hexo -v``
-
You’re ready to initialize your new site!
-
From terminal run (where ‘site’ is the folder you want)
hexo init site``
-
You’ll now see a whole bunch new files after a short install bar show up on the left explorer tab of Visual Studio Code

Files List -
Our next post will talk about actually creating content!
-
I’d recommend committing your current site in GitHub Desktop and PUSHing it up to the cloud for a backup, we can always revert back to this state if needed.

Commit and Push 
It’s a great day.
Wake up. You’re here.
Presenting to the World
It’s Time!
That’s right, it’s time to now present your new site to the world! In our last post, we got to publish the site using Cloudflare but the default URL is very much not user-friendly. We can correct this if you own a custom domain you’re wanting to use for your website.
Now all you have to do is continue to create content!
Every time you do a hexo new post "Name here" on your machine, edit the new markdown file with your content, commit and push/publish Cloudflare will automatically publish your new site and generate your index pages and tag pages.
–MrDigital
Where to Host
Deciding where to host
This is going to be a pretty important decision on where you’d like your website to live. At this point you have your framework, your new repo and your ready to create content.
You have several free (for hobbyists, personal sites) or very cheap options. I’ll list a few but we’ll focus on a single one for our demo purpose.
There are more but you can research those options on your own if you’d like something different.
Today we’ll be using CloudFlare Pages.
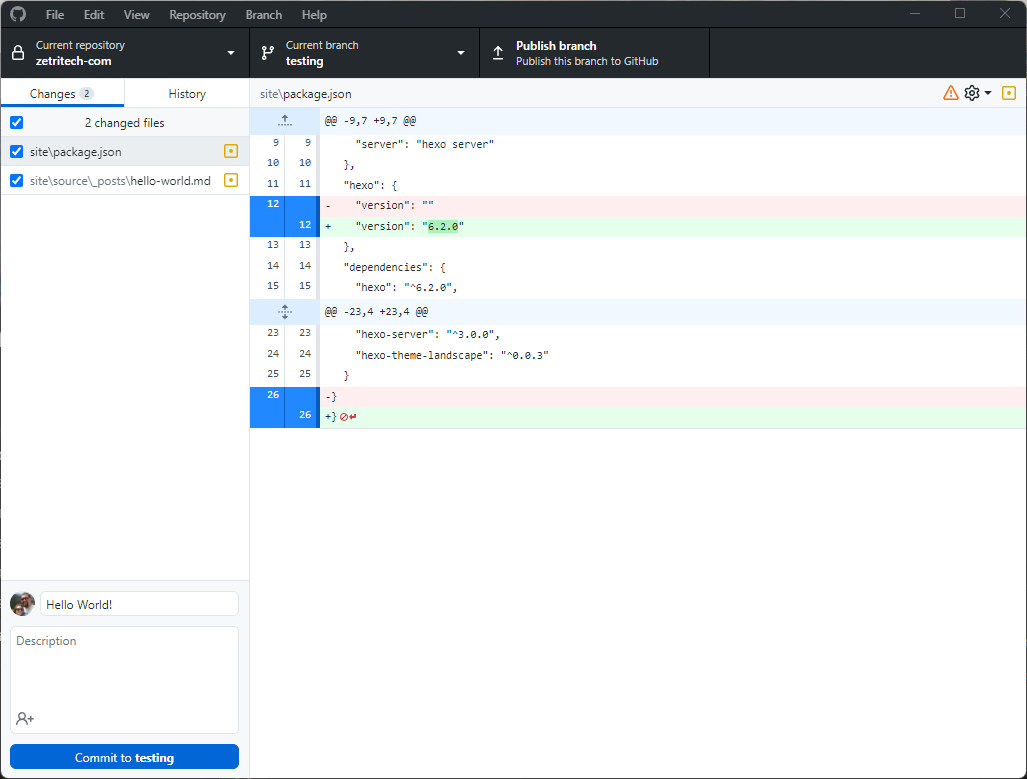
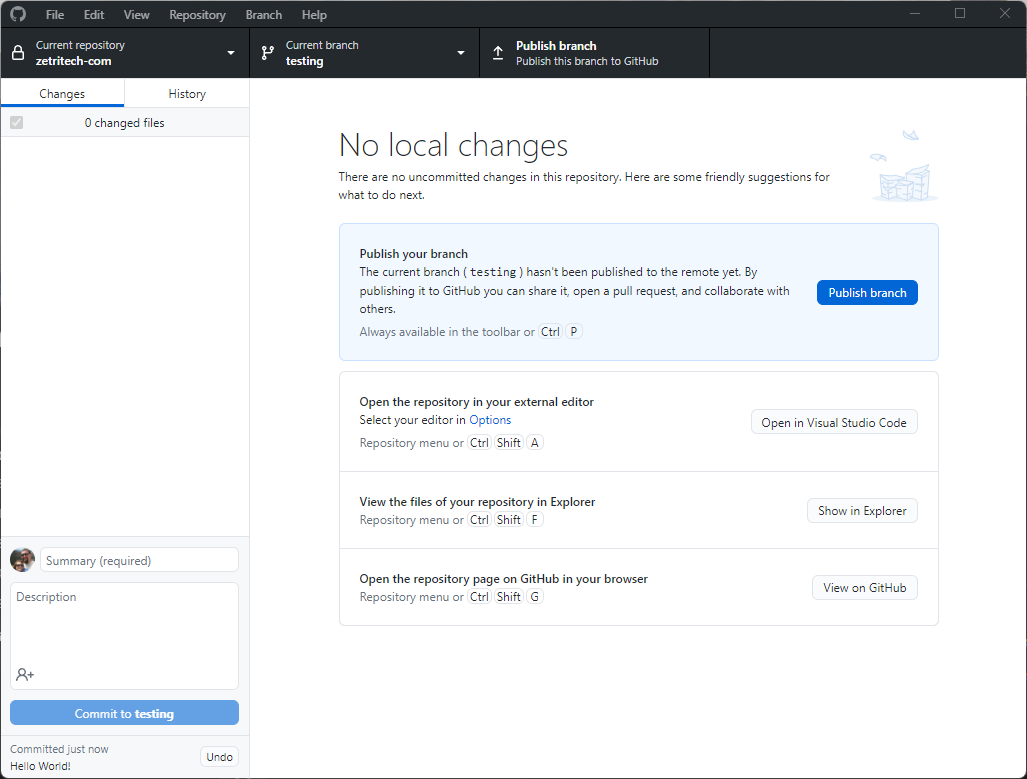
Before we get too far ahead of ourselves, did you “Commit” and “Push” your new first post you made in the last post? In our example it was “Hello World”.
If you didn’t, you’ll want to do that first.
 |
|---|
| Commit |
 |
|---|
| Publish/Push |
Time to create a FREE account at Cloudflare pages. I’ll wait.
We’ll get into some more details on next steps in the next post!
–MrDigital
Creating Content
It’s time to create content!
Now that you have your repo, your framework installed locally on your computer and your immediatly required software ready to go, it’s time to start making content!
From your terminal window you can now just type in the following command to create your first blog entry!
hexo new post "Hello World"
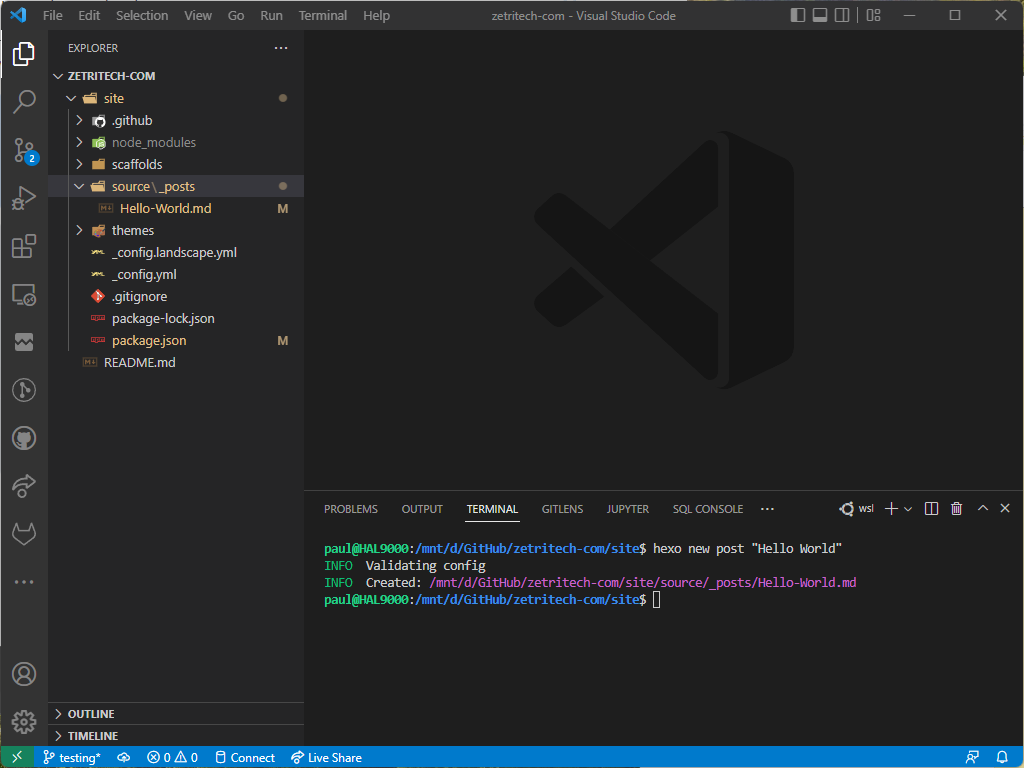 |
|---|
| First Post! |
You can now just click on the new Hello-World.md page on the left side under /source/_posts and create whatever content you wish in the Markdown format.
Just to give a small sample, this is what this page looks like so far in this language:
---
title: Creating Content
comments: true
date: 2022-07-25 23:35:21
tags: [blog,websites,hexo-tutorial]
---
## It's time to create content!
Now that you have your repo, your framework installed locally on your computer and your immediatly required software ready to go, it's time to start making content!
From your terminal window you can now just type in the following command to create your first blog entry!
```
hexo new post "Hello World"
```
||
|:--:|
| *First Post!* |
You can now just click on the new Hello-World.md page on the left side under /source/_posts and create whatever content you wish in the [Markdown](https://l.mr7.one/bay6) format.
Just to give a small sample, this is what this page looks like so far in this language:
You can see that is really is a pretty human readable format and the link above is a great starting off point. You can do this directly here in the Visual Studio Code app or use something else, even online apps like StackEdit can be very useful.
After you get your first page finished, even if it’s just Hello World!, we will move on to finding a host to actually present your page online!
–MrDigital
First Steps
We’ll assume you’re using a Windows PC
Now you can go about setting up your local environment a few ways but first we need to get your GitHub repository downloaded to your local PC.
–MrDigital
A New Beginning
Hello!
Welcome to my new ”blog” or whatever you want to call something like this. I’ve been experimenting with some new static content generators because I’m kind of tired of maintaining a WordPress blog for what seems like things that don’t need that kind of overhead. A costly (possibly) hosting plan, SQL database, plugins, themes, and updates that seem to be constantly required and maintained.
It’s not that I can’t do these things, but they are easy to forget and not get taken care of promptly, and before you know it your site is 15 versions out of date and you don’t know the ramifications of doing the updates and if it could break everything…so you don’t and just keep putting it off.
So with that, all said, I’ve been looking into the various static content generators that are out there that can make something like a website or blog easier to build, maintain, and fairly automatic. I’ll go through these steps as I’m learning this as well and will try to post steps on how all this can work.
I am experimenting with a system called Hexo and that’s what this particular website is being generated with. Sound exciting? More to come!
—MrDigital